Converting a Google Doc to a Kindle Format .mobi File
I recently had a document, written using Google Docs, that I wanted to make available in Kindle format (a .mobi file.) The thing was, I didn’t want to publish it through Amazon, I just wanted to provide a file that could be copied to a Kindle by anyone who wanted to access the material in that format. It turned out to be a little more complicated than I first thought, so if anyone else wants to do the same, I’ll explain how I did it. The thing to remember is that Google and Amazon are competitors, so they’re not going to make it easy to go from one to the other are they? No indeed…
My first thought was to export my Google Doc to Microsoft Word format. The catch seems to be that the usual way of converting a Word document to Kindle format is to upload it using Amazon Kindle Direct Publishing. This wasn’t really what I wanted to do, as I had no intention of publishing the document via Amazon. I just wanted a tool that would do a local file conversion on my machine. There are some third party apps that claim to do that with a Word file but I picked one at random and it was pretty flaky.
My next approach was to use KindleGen, a command line tool provided by Amazon. This works on several input file formats, but not Microsoft Word. It does, however, convert HTML documents, which is one of the formats that you can export from Google Docs. The problem is that the default CSS styles of the HTML document that Google Docs gives you are not well suited to Kindle. The font sizes will be all over the place because Google Docs generates a style sheet that uses point values for font sizes that look really bad on a Kindle screen. I found when reading the document on my Kindle that only the largest font size setting was readable, and that was too big. The last thing you want is a Kindle doc that doesn’t look like the other books on the reader’s Kindle. For similar reasons I also chose to remove the font family settings, preferring to let the Kindle use its default fonts. However you can leave these alone if you want.
Another issue with the default HTML format is that a couple of useful meta tags are missing from the HTML. Anyway, all this is easily fixed! What does make life a bit difficult is that Google Docs generates the names of its class styles inconsistently. Yes, that’s right, every time it generates an HTML document, it randomly renames the class styles! This completely stuffs up any attempt you might make to set up a reusable style sheet. Thank you Google! (not).
Anyway, here’s the process I followed:
Google Doc to .mobi, step-by-step
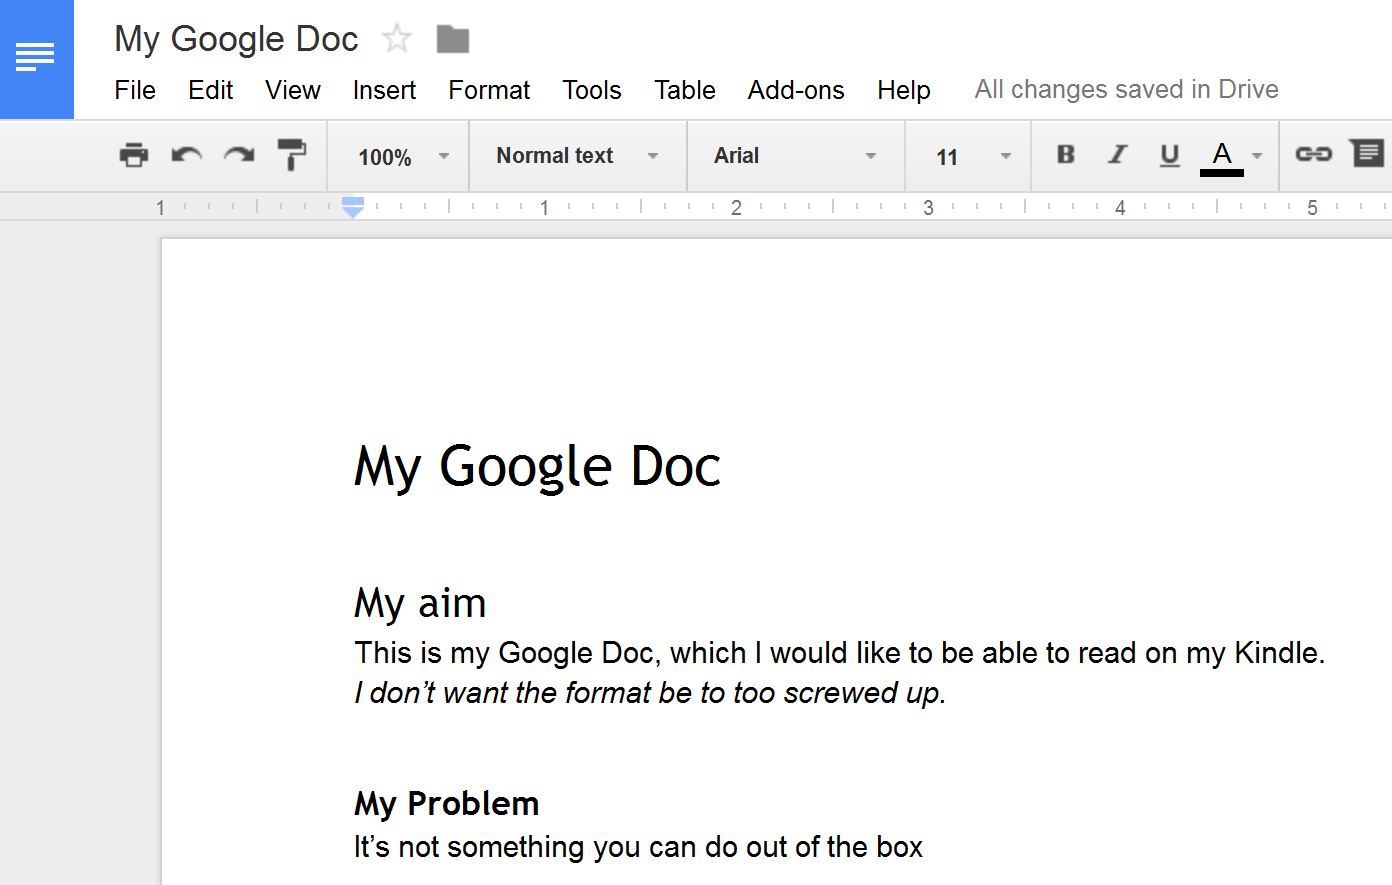
1. Start with a Google Doc. Here’s a very simple one
2. Create a new working folder. I called mine ‘kindlegen’
3. Download KindleGen from the Amazon KindleGen page. It is downloaded as a zipped archive
4. Unzip the archive into your folder
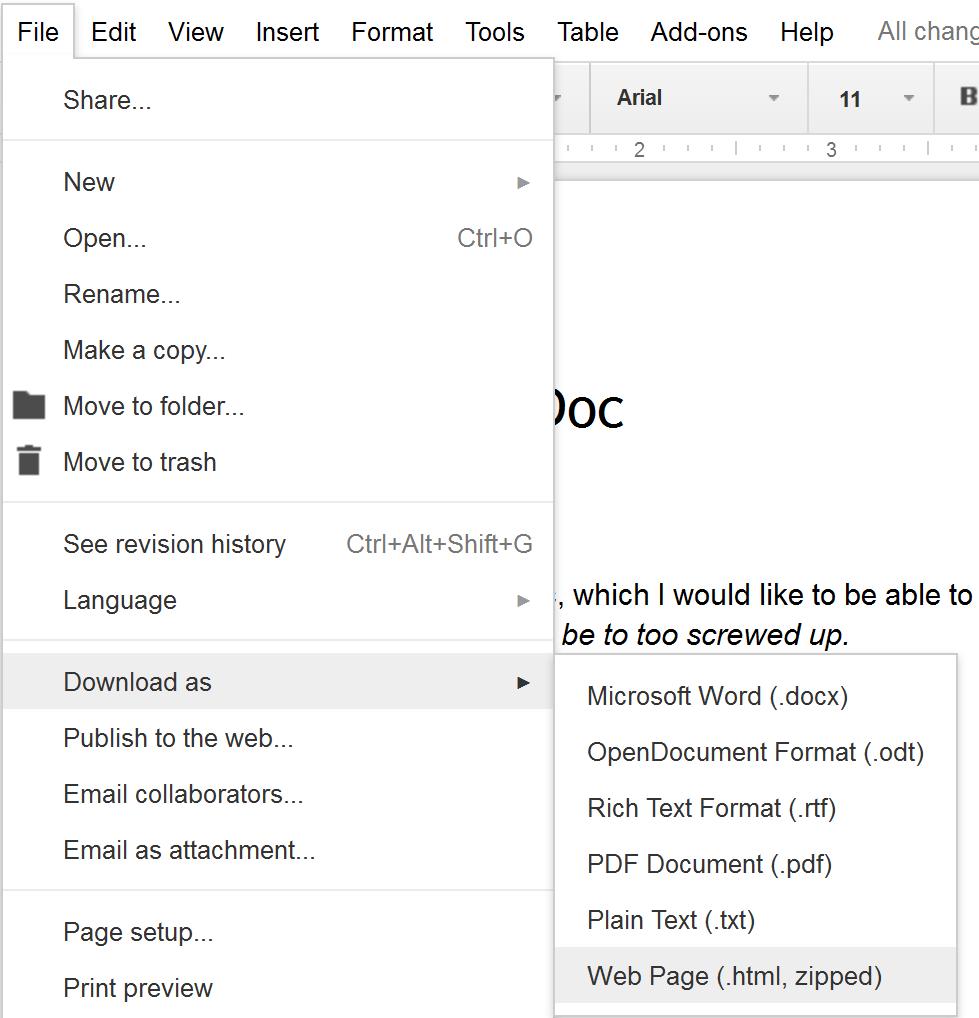
4. Export your Google Doc in HTML format: File -> Download as… -> Web Page (.html, zipped)
5. Unzip the HTML page into your working folder
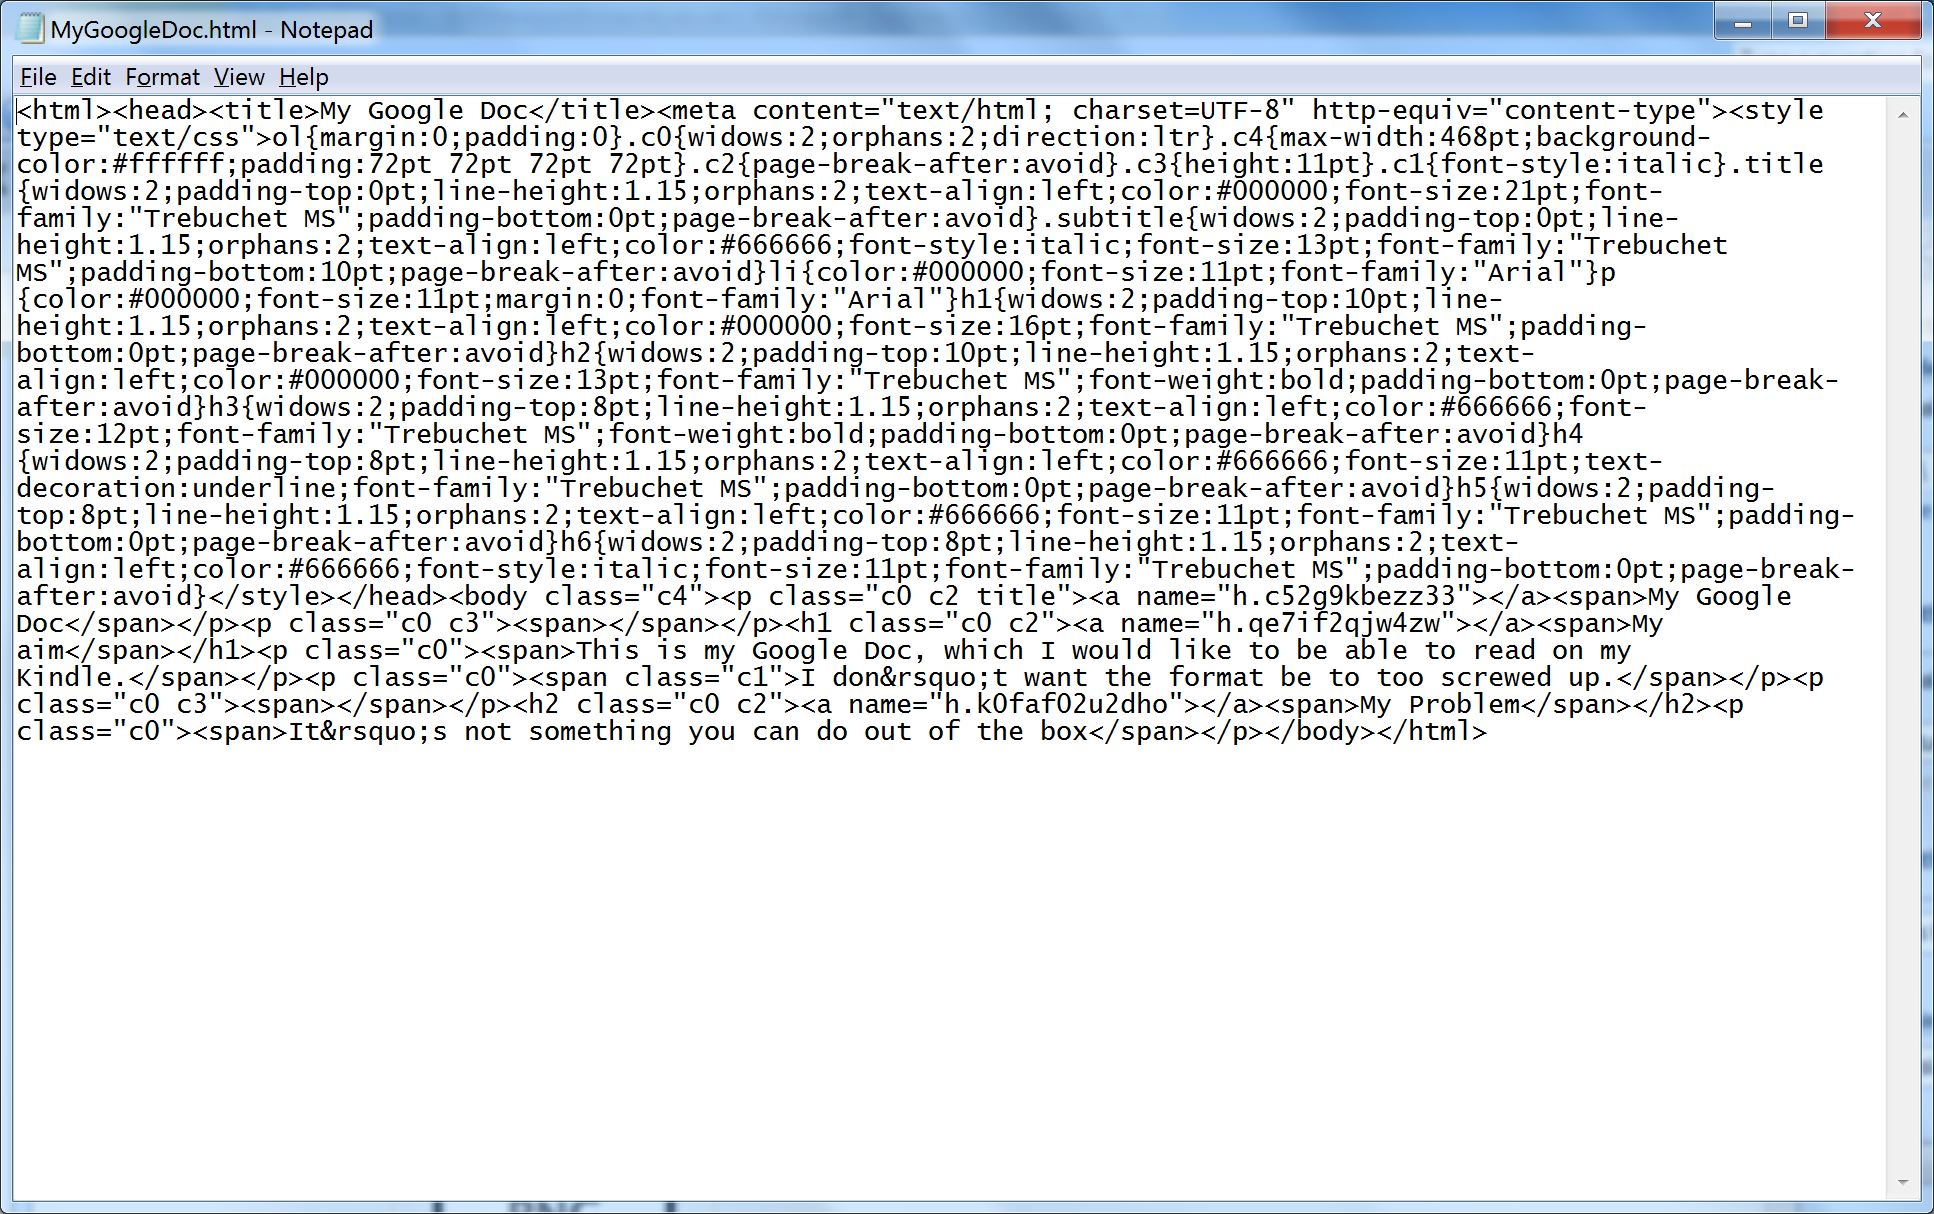
6. Open the HTML page in a suitable HTML editor. If you don’t have one, a text editor will do (though it makes it harder). Here’s what it looks like in Notepad. Not very human readable as there are no line feeds. You can manually put them in if you find it easier to navigate that way. With a proper HTML editor with color syntax highlighting it’s a lot easier.
7. You will see that near the beginning of the HTML source is a ‘style’ element containing a large number of internal CSS styles. I changed the font sizes of all of these as I couldn’t be bothered working out which ones were actually being used in my document. You need to replace all the ‘pt’ values for the ‘font-size’ elements with ’em’ values. I chose similar values, for example for 11pt, which is the standard paragraph font size, I used 1em. For 16pt headings I used 1.5 em, and so on. Basically, it’s more or less a divide by 10 exercise.
For example, here’s the generated entry for the paragraph (p) tag (unlike the various class styles the HTML element styles are at least consistent)
p{color:#000000;font-size:11pt;margin:0;font-family:”Arial”}
My updated version looks like this (I also removed the font-family):
p{color:#000000;font-size:1em;margin:0}
I didn’t find there was a need to replace any of the other parts of the styles. KindleGen will ignore any that don’t apply.
8. If you like, also remove all the ‘font-family’ entries (as above). The Kindle will be able to cope with the fonts used by the Google Doc if you leave them in.
7. By default, the ‘title’ element will contain the original file name, which may not actually be your preferred document title. If you need to, change the content of the ‘title’ element at the beginning of the file to the one you want
<title>My Book Title</title>
8. Near the top of the HTML source you should find the following ‘meta’ element, between the title element and the style element.
<meta content=”text/html; charset=UTF-8″ http-equiv=”content-type”>
Leave this alone, but add the following element above or beneath it:
<meta name=”author” content=”my name“>
If you don’t do this, when the document appears in your Kindle book list, there will be no author name associated with it.
If you want your document to have a cover image (a JPEG), you will also need to add the following element
<meta name=”cover” content=”mycoverfile.jpg”>
This assumes that your cover JPEG is going to be in the same folder as the HTML document when you convert it. If you have a cover image, add it to your working folder.
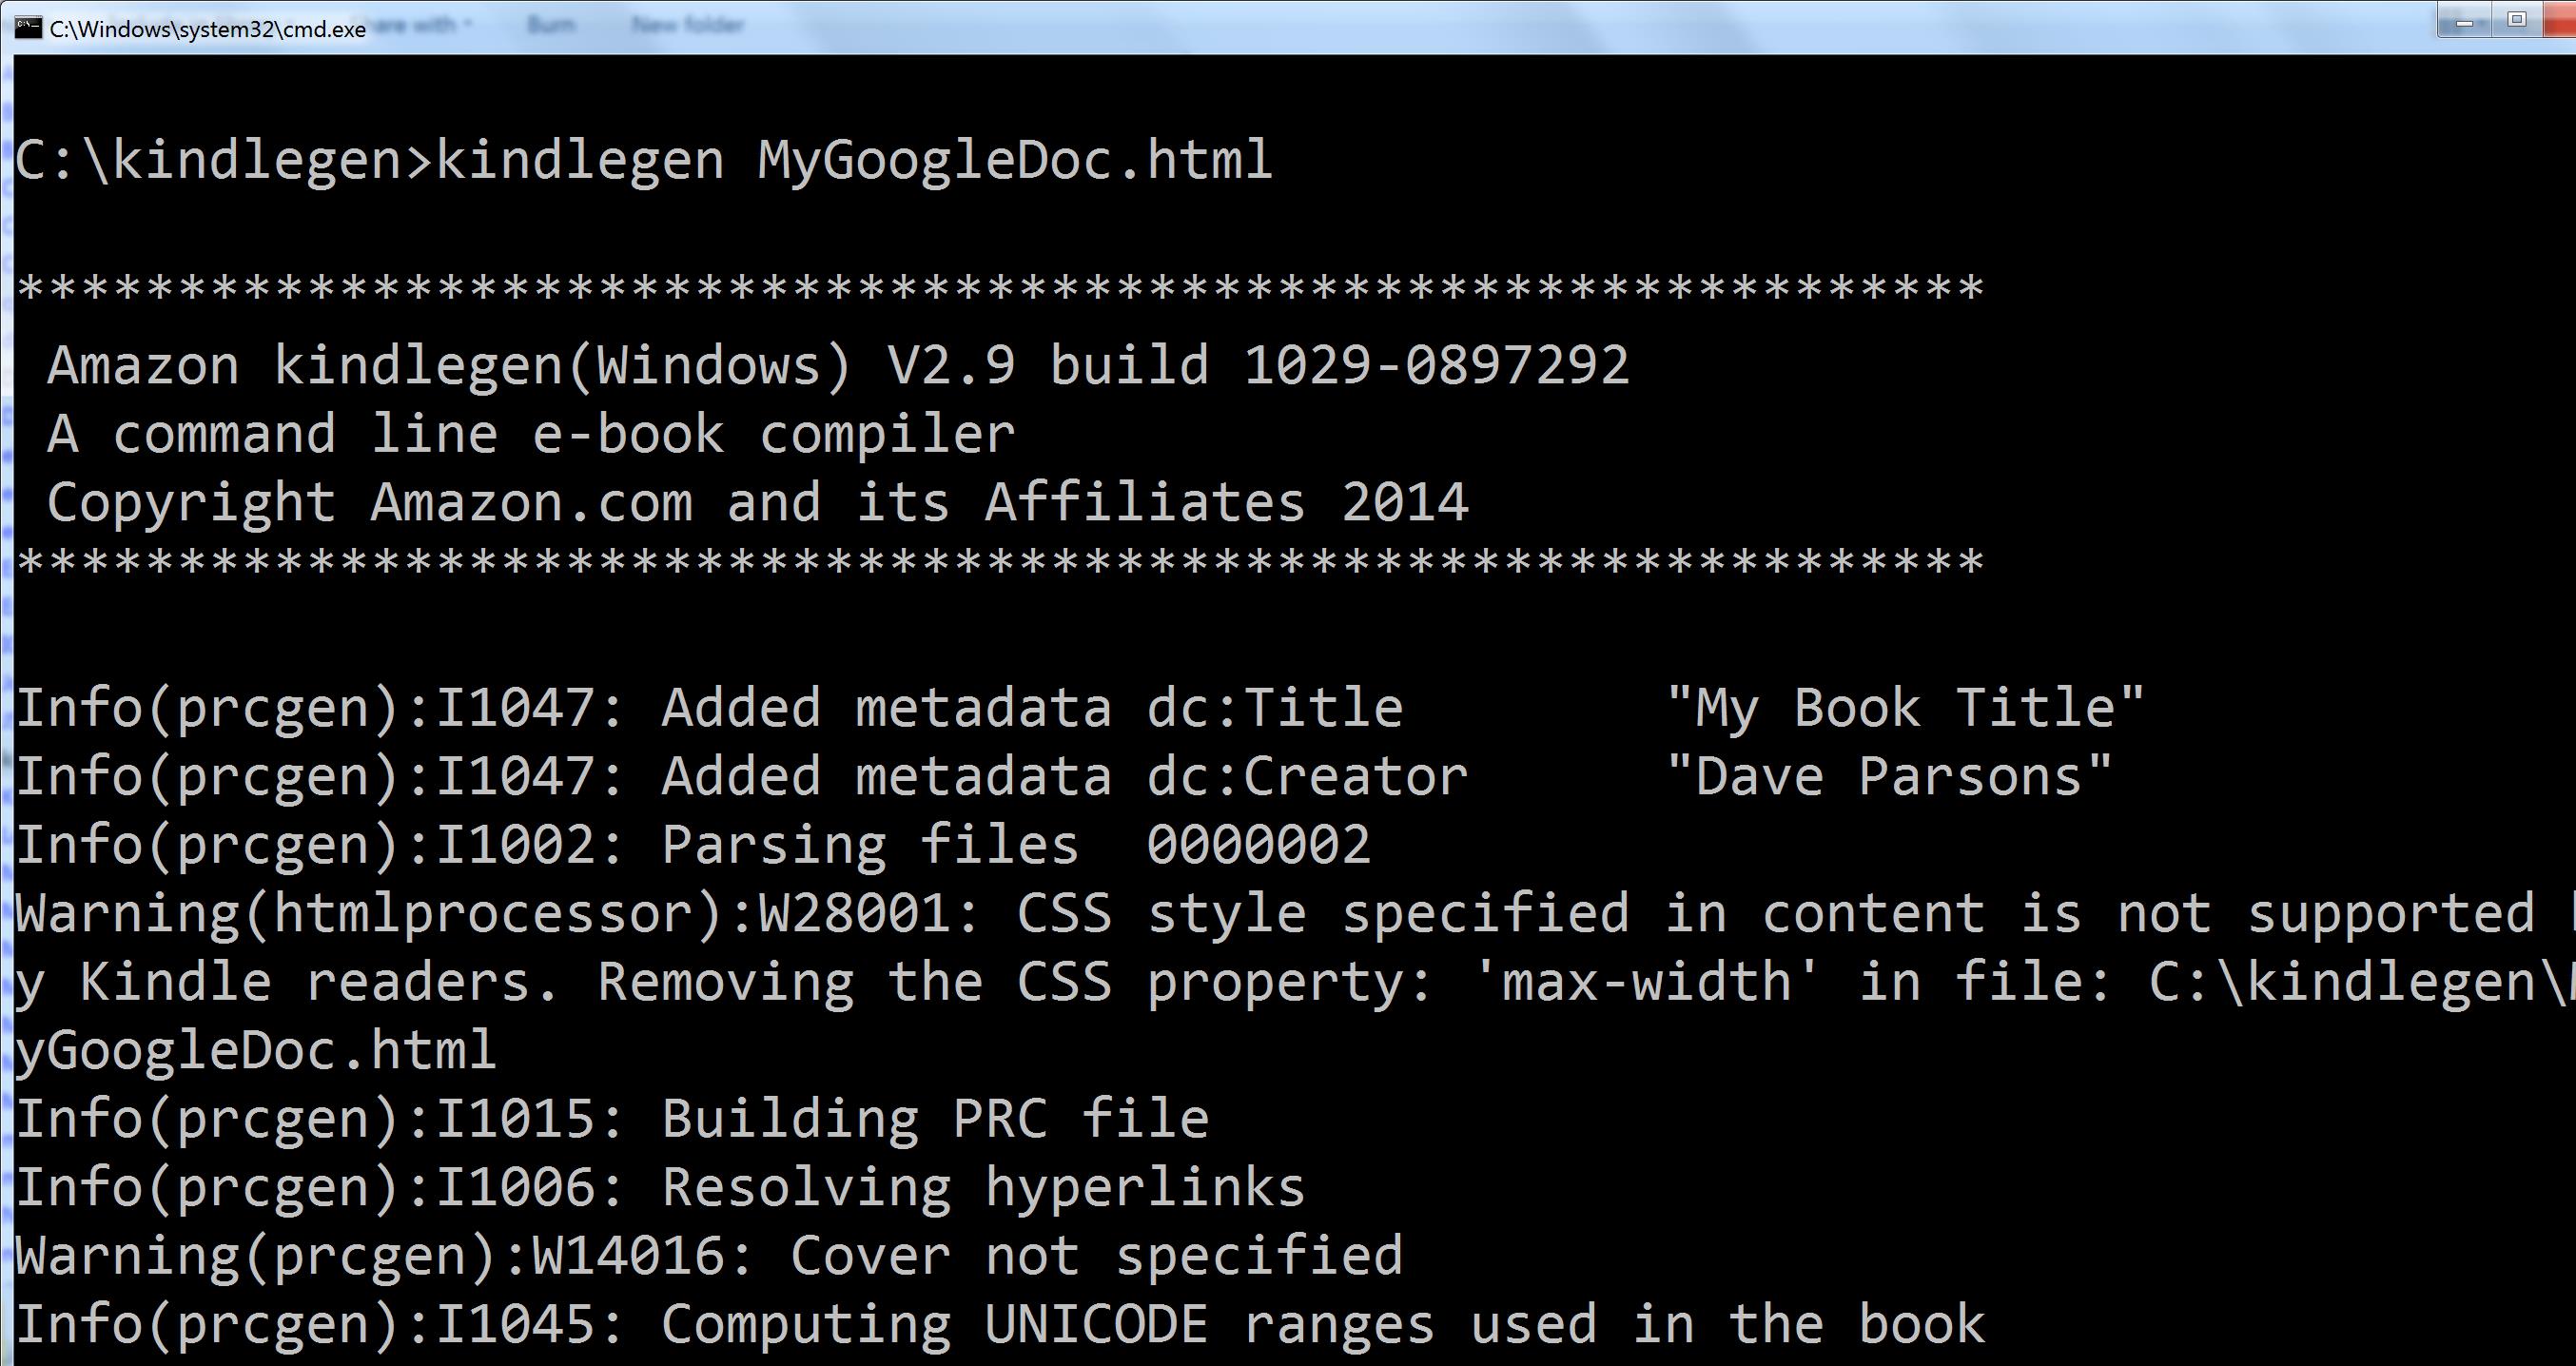
9. Open a command window in your working folder and run KindleGen against your HTML file:
kindlegen myhtmlfile.html
You may get some warnings, for example if you haven’t defined a cover image, or there are CSS styles that don’t apply. These won’t matter. In this example I didn’t provide a cover file, and the ‘max-width’ CSS property is being ignored.
Assuming there are no fatal errors, the tool will create a .mobi file in the same folder.
10. Connect your Kindle using a USB cable. Navigate to the ‘documents’ folder on the Kindle and copy your .mobi file into it (if you want you can put it in a subfolder, The Kindle will still pick it up.)
11. Eject the Kindle and check the book list. You should find your document has been added and is readable.
Here’s my file on my elderly Kindle.


